Embarking on a DIY home improvement journey can be both rewarding and empowering. It’s a chance to personalize your living space, enhance its functionality, and save money in the process. But where do you begin? This guide offers a comprehensive overview of beginner-friendly DIY projects, covering everything from painting and decorating to simple storage solutions and even outdoor improvements.
We’ll delve into the essential steps involved in each project, providing practical tips and techniques to ensure success. Whether you’re a complete novice or have some basic DIY experience, this guide will equip you with the knowledge and confidence to tackle your first home improvement projects.
Introduction
DIY home improvement projects are becoming increasingly popular, offering a rewarding way to personalize your living space and save money. Whether you’re a complete novice or have some experience, tackling these projects yourself can be both empowering and cost-effective. However, it’s crucial to prioritize safety and plan carefully to ensure a successful outcome.
Benefits of DIY Home Improvement
- Cost Savings: DIY projects can significantly reduce the overall cost of home improvements. By doing the work yourself, you eliminate labor costs, which often make up a substantial portion of the budget.
- Personalization: DIY projects allow you to customize your home to your specific preferences and needs. You can choose materials, colors, and finishes that reflect your personal style and create a space that truly feels like your own.
- Sense of Accomplishment: Completing a DIY project can provide a strong sense of accomplishment and satisfaction. It’s a rewarding experience to see your hard work come to fruition and enjoy the results of your efforts.
Safety Precautions
Safety should always be your top priority when undertaking any DIY project. Before starting, it’s essential to familiarize yourself with the potential risks and take appropriate precautions to protect yourself from injury.
- Proper Tools and Equipment: Use the right tools and equipment for the job, ensuring they are in good working condition. Never attempt to use tools you are not familiar with or comfortable using.
- Protective Gear: Always wear appropriate protective gear, such as safety glasses, gloves, and a dust mask, to protect yourself from potential hazards.
- Electrical Safety: When working with electricity, exercise extreme caution. Always disconnect power to the area you are working on before beginning any electrical work. Consult a qualified electrician for any complex or high-voltage projects.
- Ladder Safety: If you are working at heights, use a sturdy ladder and ensure it is placed on a stable surface. Always maintain three points of contact with the ladder and never overextend yourself.
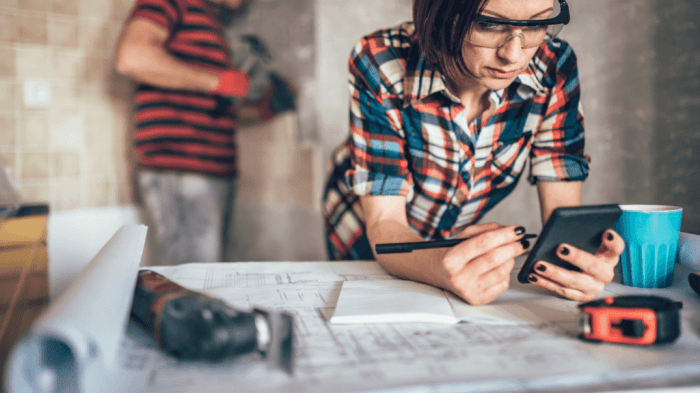
Planning and Preparation
Thorough planning is essential for a successful DIY project. Taking the time to plan carefully will help you avoid costly mistakes and ensure you have the necessary materials and tools before you begin.
- Define the Scope: Clearly define the scope of your project and break it down into manageable steps. This will help you stay organized and track your progress.
- Gather Materials: Create a detailed list of materials you will need and purchase them in advance. Consider purchasing extra materials in case of unexpected needs or errors.
- Research and Learn: Before starting, research the project thoroughly. Consult online tutorials, books, or videos to gain a better understanding of the process and any potential challenges.
- Seek Professional Advice: For more complex projects, it’s always wise to seek professional advice from a contractor or experienced DIYer. They can provide valuable insights and guidance, helping you avoid costly mistakes.
Easy DIY Projects for Beginners

Embarking on your DIY journey can be both exciting and rewarding. Starting with simple projects is key to building confidence and learning valuable skills. This section will guide you through a selection of beginner-friendly home improvement projects, providing a detailed breakdown of the necessary tools, materials, and estimated time and cost.
Easy DIY Projects for Beginners
Here’s a list of easy DIY projects for beginners, categorized by difficulty level, estimated time, and cost. These projects are perfect for those new to DIY and can be completed with basic tools and materials.
| Project Name | Difficulty Level | Estimated Time | Cost |
|---|---|---|---|
| Painting a Room | Beginner | 4-8 hours | $50 – $150 |
| Installing a Light Fixture | Beginner | 1-2 hours | $20 – $50 |
| Replacing Cabinet Hardware | Beginner | 1-2 hours | $10 – $30 |
| Building a Simple Shelf | Beginner | 2-4 hours | $20 – $50 |
| Adding a Backsplash | Intermediate | 4-8 hours | $50 – $150 |
Painting and Decorating
Painting and decorating are essential skills for any homeowner. They can transform a space, refresh a tired look, or even increase the value of your home. With some basic tools and techniques, you can tackle a variety of painting projects, from a simple accent wall to a complete room makeover.
Surface Preparation
Surface preparation is the most crucial step in any painting project. A well-prepared surface will ensure a smooth, even finish and prevent paint from peeling or chipping. Here’s a step-by-step guide:
- Clean the Surface: Remove dirt, dust, grease, and cobwebs using a damp cloth or a vacuum cleaner. For oily surfaces, use a degreaser.
- Repair Any Damages: Fill in cracks, holes, and dents with spackle or patching compound. Allow the filler to dry completely before sanding it smooth.
- Sand the Surface: Use sandpaper to smooth out rough spots and create a uniform surface for painting. Start with coarse sandpaper and gradually move to finer grits.
- Prime the Surface: A primer helps the paint adhere better and provides a uniform base coat. It also hides imperfections and prevents stains from bleeding through.
Paint Selection
Choosing the right paint can significantly impact the final look and durability of your project. Consider the following factors:
- Type of Paint: There are different types of paint available, including latex, oil-based, and acrylic. Latex paint is water-based, dries quickly, and is easy to clean up. Oil-based paint is more durable and provides a smoother finish, but it takes longer to dry and requires mineral spirits for cleanup. Acrylic paint is a popular choice for its durability, water-based formula, and low VOC emissions.
- Finish: Paint finishes range from flat to gloss. Flat finishes are good for hiding imperfections, while gloss finishes are more durable and washable. Semi-gloss and satin finishes offer a good balance of durability and aesthetics.
- Color: Choose a color that complements the existing decor and your personal preferences. Consider using a color wheel to find complementary and analogous colors.
Painting a Room
Here’s a step-by-step guide for painting a room:
- Prepare the Room: Remove furniture, fixtures, and wall decor. Cover the floor with drop cloths and tape off areas that you don’t want to paint, such as trim, windows, and doors.
- Cut In: Use a paintbrush to apply a thin layer of paint along the edges of the room, such as around trim, windows, and doors. This is called “cutting in” and ensures clean lines.
- Paint the Walls: Use a roller to apply paint to the walls. Start at the top and work your way down, using long, smooth strokes.
- Apply a Second Coat: Once the first coat is dry, apply a second coat for a more even finish and better coverage.
- Clean Up: Remove tape and drop cloths. Clean your brushes and rollers with soap and water (for latex paint) or mineral spirits (for oil-based paint).
Tips for Professional-Looking Paint Finishes
- Use a High-Quality Brush and Roller: Invest in good-quality brushes and rollers for a smoother finish.
- Load the Brush or Roller Properly: Don’t overload the brush or roller with paint. This can lead to drips and uneven coverage.
- Use Long, Smooth Strokes: Apply paint in long, even strokes to avoid brush marks.
- Don’t Overlap Too Much: Overlapping too much can cause paint to build up and create unevenness.
- Let the Paint Dry Completely: Allow the paint to dry completely between coats. This ensures a smooth, even finish.
Simple Storage Solutions
Storage is a crucial aspect of any home, especially for beginners who may be working with limited space. Effective storage solutions not only help organize your belongings but also create a sense of order and tranquility in your living environment. Simple DIY projects can be incredibly helpful in maximizing your storage space without breaking the bank.
Building a Simple Bookshelf
A bookshelf is a classic and versatile storage solution that can be easily built with basic materials and tools. Building a simple bookshelf is a great project for beginners as it involves straightforward cuts and assembly.Here are the materials you will need:
- Wood boards (choose the desired length and width based on your bookshelf size)
- Wood screws
- Wood glue
- Measuring tape
- Saw (hand saw or circular saw)
- Drill
- Level
- Sandpaper
- Paint or stain (optional)
Follow these steps to build a simple bookshelf:
- Measure and cut the wood: Use the measuring tape to determine the length and width of your bookshelf. Cut the wood boards to the desired dimensions using a saw.
- Assemble the shelves: Using wood glue and screws, attach the shelves to the side panels. Ensure that the shelves are level and spaced evenly.
- Attach the back panel: Cut a piece of plywood or MDF to fit the back of the bookshelf. Attach it using screws or glue.
- Sand and finish: Sand the bookshelf to smooth out any rough edges. If desired, paint or stain the bookshelf to match your decor.
Organizing a Closet
A well-organized closet can make a significant difference in the overall neatness of your bedroom. Simple DIY projects can transform your closet from a chaotic mess to a streamlined and efficient space.Here are some ideas for organizing your closet:
- Utilize vertical space: Hang clothes on tiered rods to maximize vertical space. Install shelves above the hanging rod to store folded items or bins.
- Create compartments: Use dividers or baskets to separate items within your closet. This will make it easier to find what you need and prevent clothes from getting jumbled together.
- Hang shoe organizers: Hang shoe organizers on the back of the closet door or on a wall to store shoes efficiently. This frees up floor space and keeps shoes organized.
- Install a pull-out drawer: Install a pull-out drawer under the hanging rod to store small items, such as belts, scarves, or jewelry. This provides easy access to these items and keeps them from getting lost in the back of the closet.
Repurposed Materials for Creative Storage Solutions
Repurposing materials is an eco-friendly and cost-effective way to create unique storage solutions. Old crates, ladders, and even discarded furniture can be transformed into functional and stylish storage pieces.
“Think outside the box and let your creativity guide you when repurposing materials.”
Here are some examples of repurposed materials for creative storage solutions:
- Wooden crates: Wooden crates can be stacked, painted, and used as shelves, drawers, or even as decorative storage boxes.
- Ladders: Old ladders can be repurposed as shelving units, towel racks, or even as a unique plant stand.
- Discarded furniture: Old dressers, nightstands, or even coffee tables can be refinished and used for storage. You can add shelves, drawers, or baskets to enhance their functionality.
Upgrading Kitchen and Bathroom
The kitchen and bathroom are two of the most important rooms in any home. They are also two of the most frequently used rooms, so it is important to make sure they are both functional and aesthetically pleasing. If you’re looking for some simple DIY projects to upgrade these spaces, there are many options available. You don’t need to be a professional to make a big difference with a little time and effort.
Replacing Cabinet Hardware
Replacing cabinet hardware is a simple and affordable way to give your kitchen or bathroom a new look. The right cabinet hardware can transform the overall style of your space, from modern and minimalist to traditional and elegant.
- Before you start, it’s important to choose the right hardware for your cabinets. Consider the style of your cabinets, the overall look you’re going for, and the size of the hardware.
- Once you’ve chosen your hardware, you’ll need to remove the old hardware. This is usually a simple process of unscrewing the old knobs or pulls.
- Next, you’ll need to install the new hardware. This is also usually a simple process of screwing the new knobs or pulls into place.
- If you’re replacing the hinges on your cabinets, you may need to drill new holes. However, this is a fairly straightforward process, and there are many tutorials available online.
Updating Faucets
Updating faucets is another simple and affordable way to upgrade your kitchen or bathroom. Faucets are a focal point in both rooms, and replacing them can make a big difference in the overall look and feel of the space.
- You can find faucets in a variety of styles and finishes, so you can choose the perfect ones to match your decor. There are many options for styles, finishes, and even the types of spray heads available.
- Replacing a faucet is a fairly straightforward process, and there are many tutorials available online.
- Before you start, make sure to turn off the water supply to the faucet. You will also need to disconnect the old faucet and then install the new one. It is important to follow the manufacturer’s instructions carefully.
- If you’re not comfortable doing this yourself, you can always hire a plumber.
Installing New Lighting Fixtures
Installing new lighting fixtures is a great way to add style and functionality to your kitchen or bathroom. Lighting can really set the mood in any space, so choose fixtures that will complement the overall design and atmosphere of your rooms.
- You can find lighting fixtures in a variety of styles, sizes, and finishes, so you can choose the perfect ones to match your decor.
- Installing a new lighting fixture is a fairly straightforward process, and there are many tutorials available online.
- Before you start, make sure to turn off the power to the fixture. You will also need to remove the old fixture and then install the new one.
- If you’re not comfortable doing this yourself, you can always hire an electrician.
Sealing and Waterproofing
Sealing and waterproofing are essential in bathroom renovations. Proper sealing and waterproofing will help to prevent water damage and mold growth.
- Before you start any bathroom renovations, it’s important to seal any cracks or gaps in the walls and floors.
- You should also apply a waterproof sealant to the shower walls and floor. There are many different types of waterproof sealants available, so it’s important to choose one that is appropriate for your bathroom.
- When installing a new shower or bathtub, it’s important to make sure that the installation is properly waterproofed. This includes using waterproof grout and sealant around the edges of the shower or tub.
Outdoor Improvements
Taking your DIY skills outside can transform your yard into a beautiful and functional space. From creating a cozy patio to adding a flourishing garden, outdoor projects can be both rewarding and enjoyable. This section will guide you through some beginner-friendly outdoor improvements that can make a big difference in your home’s curb appeal and your enjoyment of the outdoors.
Building a Raised Garden Bed
Building a raised garden bed is a great way to add greenery to your yard, even if you have limited space or poor soil quality. It allows you to control the soil and drainage, making it easier to grow a variety of plants.Here are the steps to build a raised garden bed:
- Choose a location: Select a sunny spot with good drainage. Consider the size of the bed you want and make sure it fits comfortably in the chosen location.
- Gather materials: You’ll need wood planks, screws, and soil. Choose rot-resistant wood, such as cedar or redwood, for longevity.
- Cut the planks: Measure and cut the planks to the desired size of your garden bed.
- Assemble the frame: Use screws to attach the planks together to form a rectangular or square frame.
- Add soil: Fill the bed with a good quality potting mix or garden soil. You can also add compost or other amendments to enrich the soil.
- Plant your plants: Once the bed is filled with soil, you can start planting your favorite vegetables, herbs, or flowers.
Creating a Patio Space
A patio can be a wonderful addition to any home, providing an outdoor space for relaxation, dining, or entertaining. Here are some ideas for creating a patio space:
- Choose a location: Select a sunny or partially shaded spot that is easily accessible from your home.
- Determine the size: Consider how much space you need for furniture, seating, and any other features you want to include.
- Choose a material: Patio materials range from concrete and pavers to wood and composite decking. Consider your budget, style preferences, and the climate in your area.
- Add furniture: Choose comfortable furniture that suits your style and the size of your patio. You may want to include a table and chairs, a sofa, or lounge chairs.
- Enhance the ambiance: Add some decorative touches, such as plants, lanterns, or a water feature, to create a welcoming and inviting atmosphere.
Landscaping and Maintaining a Small Yard
Landscaping a small yard can be a challenge, but with some planning and creativity, you can create a beautiful and functional space. Here are some tips for landscaping a small yard:
- Plan your layout: Consider the purpose of your yard and how you want to use the space. A small yard can be a great spot for a garden, a patio, or a play area for children.
- Choose the right plants: Select plants that are suitable for your climate and soil conditions. Consider their mature size and growth habits to ensure they don’t overwhelm the space.
- Create visual interest: Use a variety of textures and colors to create visual interest. For example, you can mix evergreen shrubs with flowering plants.
- Add vertical elements: Vertical elements, such as trellises or walls, can help to create a sense of depth and make a small yard feel larger.
- Keep it simple: Avoid overcrowding the space with too many plants or features. Keep it simple and let the natural beauty of your yard shine through.
Adding Outdoor Lighting
Outdoor lighting can transform your yard from a dark and uninviting space into a beautiful and welcoming oasis. Here are some tips for adding outdoor lighting:
- Choose the right type of lighting: There are many different types of outdoor lighting available, including path lights, spotlights, string lights, and lanterns. Choose the types that best suit your needs and style.
- Consider the placement: Think about how you want to use the space and where you need light. Path lights can guide visitors to your front door, spotlights can highlight landscaping features, and string lights can create a cozy atmosphere.
- Create a welcoming ambiance: Use warm white light to create a warm and inviting atmosphere. You can also use colored lights to add a touch of personality.
From painting a room to building a simple bookshelf, the possibilities for DIY home improvement are endless. Remember, safety and planning are crucial, so take your time, gather the right tools, and enjoy the process. With a little creativity and effort, you can transform your home into a space that reflects your personal style and enhances your daily life.
Questions and Answers
What are the essential tools for a beginner DIYer?
Start with basic tools like a hammer, screwdriver, measuring tape, level, and utility knife. As you progress, you can add more specialized tools as needed.
Where can I find affordable DIY supplies?
Check out local hardware stores, discount retailers, and online marketplaces. Don’t forget to look for deals and clearance items.
How can I ensure my DIY projects are safe?
Always prioritize safety by wearing appropriate protective gear, following instructions carefully, and taking breaks when needed.
What are some common mistakes to avoid as a beginner?
Avoid rushing the process, neglecting proper planning, and using tools you’re not familiar with.