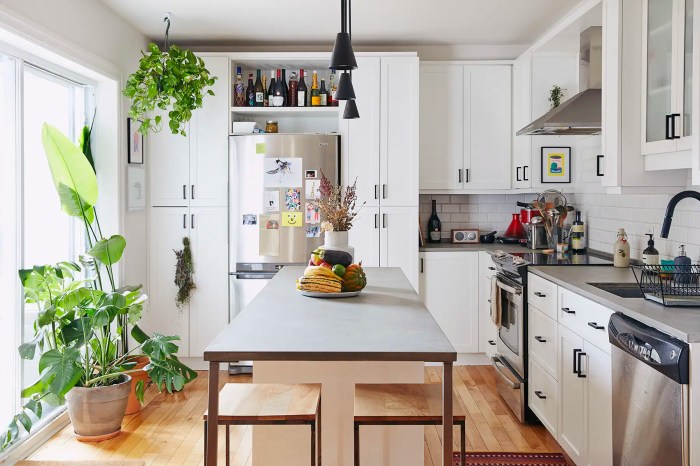
Transforming your kitchen with a new backsplash can elevate the space’s style and functionality. This guide walks you through the process, from planning and preparation to installation and finishing touches. Whether you’re a seasoned DIY enthusiast or a first-time renovator, these steps will equip you with the knowledge to create a stunning and durable backsplash.
We’ll delve into the essential aspects of choosing the right materials, understanding tile patterns, and mastering the art of grouting. From selecting the perfect backsplash to ensure it complements your kitchen’s design to applying adhesive and grout with precision, this comprehensive guide will provide you with the tools and techniques to achieve a professional-looking result.
Planning Your Backsplash Installation

A well-planned backsplash installation is key to a successful kitchen remodel. Accurate measurements and a thoughtful material selection will ensure a beautiful and functional backsplash that complements your kitchen design.
Backsplash Material Options
The backsplash is a focal point of the kitchen, so choosing the right material is essential. There are many options available, each with its own unique advantages and disadvantages.
- Tile: Tile is a popular backsplash material due to its durability, affordability, and wide variety of styles and colors. Ceramic tile is a classic choice, while porcelain tile offers greater durability and water resistance. Glass tile adds a modern touch, and mosaic tile can create intricate patterns.
- Stone: Natural stone backsplashes, such as granite, marble, and slate, bring a touch of elegance and sophistication to the kitchen. They are durable and heat-resistant, but can be more expensive than other materials.
- Glass: Glass backsplashes are sleek and modern, reflecting light and creating a bright and airy feel. They are easy to clean and come in a wide range of colors and finishes.
- Metal: Metal backsplashes, such as stainless steel, copper, or aluminum, are durable and easy to clean. They can add a contemporary or industrial feel to the kitchen.
Choosing the Right Backsplash
The best backsplash for your kitchen will depend on your personal style, budget, and the overall design of your kitchen. Consider these factors when making your decision:
- Style: Choose a backsplash that complements the style of your kitchen. A traditional kitchen might benefit from a classic tile backsplash, while a modern kitchen might be better suited to a sleek glass or metal backsplash.
- Budget: Backsplash materials vary widely in price. Tile is generally the most affordable option, while natural stone and custom-made backsplashes can be more expensive.
- Maintenance: Some backsplash materials require more maintenance than others. For example, natural stone backsplashes may need to be sealed regularly to prevent staining.
Preparing the Kitchen for Installation
Before you start installing your backsplash, you’ll need to prepare the kitchen area. This involves clearing the countertop and backsplash area, gathering the necessary tools and materials, and taking steps to protect surrounding surfaces.
Clearing the Kitchen Countertop and Backsplash Area
It’s important to clear the countertop and backsplash area before starting the installation process. This includes removing any items that might be in the way, such as appliances, decorative items, and food.
- Unplug and move appliances: Move any appliances, such as toasters, blenders, and coffee makers, away from the work area. Unplug them to ensure safety.
- Remove decorative items: Remove any decorative items, such as picture frames, plants, and sculptures, from the countertop and backsplash area.
- Clear the countertop: Remove any items from the countertop, such as dishes, utensils, and food.
- Remove backsplash: If you are replacing an existing backsplash, remove it carefully, taking care not to damage the surrounding walls or cabinets.
Gathering Tools and Materials
You’ll need several tools and materials for backsplash installation. Make sure you have the following:
- Adhesive: The type of adhesive you need will depend on the type of backsplash tiles you are using. For example, thinset mortar is commonly used for ceramic and porcelain tiles, while mastic adhesive is often used for glass or stone tiles.
- Grout: Grout is used to fill the spaces between tiles. The color of the grout should complement the color of the tiles.
- Spacers: Spacers are used to create even gaps between tiles. They are available in various sizes, depending on the size of the tiles and the desired grout line width.
- Level: A level is essential for ensuring that the tiles are installed straight and level.
- Notched trowel: This tool is used to spread the adhesive evenly on the wall.
- Grout float: This tool is used to apply and smooth the grout between tiles.
- Grout sponge: This sponge is used to clean excess grout from the tiles.
- Bucket: You will need a bucket for mixing the adhesive and grout.
- Safety glasses: Wear safety glasses to protect your eyes from debris.
- Gloves: Wear gloves to protect your hands from the adhesive and grout.
Protecting Surrounding Surfaces and Appliances
It’s important to protect surrounding surfaces and appliances from damage during the installation process. Here are some tips:
- Cover cabinets and countertops: Cover the cabinets and countertops with drop cloths or plastic sheeting to protect them from dust and debris.
- Tape off areas: Use painter’s tape to protect areas that you don’t want to be covered in adhesive or grout.
- Remove or protect appliances: If possible, remove appliances from the area. If you can’t remove them, cover them with plastic sheeting.
Installing the Backsplash Tiles
Now that your wall is prepped, it’s time to get your hands dirty and start installing those beautiful tiles. This is where the real fun begins! You’ll be amazed at how quickly your kitchen transforms as you lay each tile.
Applying Adhesive and Placing Tiles
Before you start laying tiles, you need to apply adhesive to the wall. This will ensure your tiles stay firmly in place.
- Apply Adhesive: Using a notched trowel, spread a thin layer of adhesive onto the wall. The size of the notch on the trowel will depend on the size of your tiles. A larger notch is needed for larger tiles, and a smaller notch for smaller tiles.
- Place the First Tile: Start at a corner or a central point and place your first tile, making sure it’s level and plumb. Press firmly to ensure good adhesion.
- Space the Tiles: Use spacers to maintain even grout lines. These spacers are usually plastic or rubber and come in various sizes. They’re essential for creating a professional-looking backsplash.
- Continue Placing Tiles: Continue placing tiles, ensuring they are level and plumb. Check for even spacing between tiles and adjust as needed.
- Clean Up Excess Adhesive: Immediately wipe away any excess adhesive with a damp sponge. This will prevent the adhesive from drying and making it difficult to remove later.
Using Spacers for Even Grout Lines
Spacers are essential for ensuring consistent grout lines. These small, often plastic or rubber pieces are placed between tiles as you install them. They create uniform gaps, ensuring that your grout lines are even and visually appealing.
Pro Tip: Choose spacers that are the same size as your desired grout line. If you want a 1/8-inch grout line, use 1/8-inch spacers.
Tile Laying Patterns
There are various tile laying patterns, each creating a unique visual impact. Here are a few popular options:
| Pattern | Description | Visual Impact |
|---|---|---|
| Running Bond | Tiles are laid in a staggered pattern, with each row offset by half the length of the tile. | Simple and classic, creates a subtle visual interest. |
| Brick | Tiles are laid in a staggered pattern, similar to running bond, but with a slight offset in each row. | Similar to running bond but with a more pronounced visual interest. |
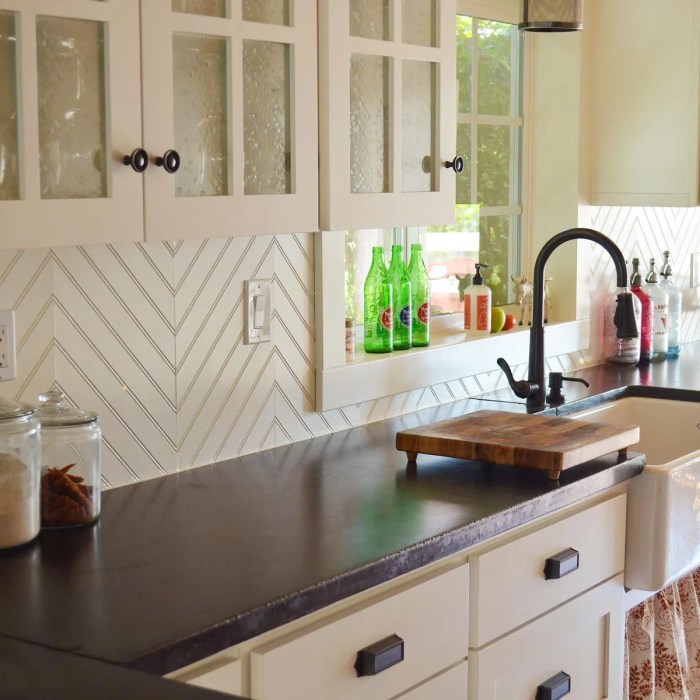
| Herringbone | Tiles are laid in a V-shaped pattern, creating a distinctive zig-zag effect. | Creates a dynamic and visually interesting pattern. |
| Basketweave | Tiles are laid in a woven pattern, creating a textured and intricate design. | Adds a touch of elegance and sophistication. |
Grouting the Backsplash
Grouting is the final step in installing your backsplash, and it’s essential for creating a polished and durable finish. It fills the gaps between the tiles, preventing water and debris from seeping in, and provides a seamless and attractive look.
Mixing and Applying Grout
Before you start grouting, ensure the backsplash is completely dry. Grout comes in a variety of colors and finishes, so choose one that complements your tiles and kitchen design.
- Follow the manufacturer’s instructions for mixing the grout. Typically, you’ll mix the grout powder with water to create a smooth, spreadable consistency.
- Use a grout float to apply the grout to the spaces between the tiles, working in small sections at a time. Press the grout into the gaps firmly, ensuring it’s evenly distributed and flush with the tile surface.
- Hold the float at a 45-degree angle to the tile surface to ensure that the grout is evenly distributed and that you don’t get excess grout on the face of the tiles.
Achieving a Smooth and Even Grout Finish
After applying the grout, use a damp sponge to remove excess grout from the tile surface.
- Work in small sections, wiping away the excess grout in a circular motion. Rinse the sponge frequently to prevent the grout from drying on the tile surface.
- Wait for the grout to partially set before cleaning the tile surface. This will allow the grout to harden slightly, making it easier to remove excess grout.
- Avoid pressing too hard on the sponge, as this could dislodge the grout from the gaps between the tiles.
Cleaning and Sealing Grout
After the grout has fully set, you can clean the tiles and grout lines with a damp cloth to remove any remaining residue.
- For stubborn stains, use a grout cleaner specifically designed for your type of grout. Follow the manufacturer’s instructions carefully.
- Sealing the grout is crucial to protect it from stains and water damage. Apply a sealant to the grout lines with a brush or sponge, ensuring that it’s evenly distributed. Allow the sealant to dry completely before using the backsplash.
Finishing Touches and Maintenance
Once your backsplash is installed and the grout has dried, you’re almost done! The finishing touches will make your new backsplash truly shine.
Cleaning and Maintaining Your Backsplash
A clean backsplash is a beautiful backsplash. Here are some tips for keeping your backsplash looking its best:
- Regular Cleaning: Wipe down your backsplash with a damp cloth after each use to prevent grease and food splatters from building up.
- Deep Cleaning: For tougher stains, use a mild dish soap and a soft sponge. Avoid abrasive cleaners or scouring pads, as they can scratch the surface of your tiles.
- Grout Cleaning: Grout can accumulate dirt and grime, so it’s important to clean it regularly. You can use a grout cleaner or a mixture of baking soda and water to clean the grout.
Sealing Your Backsplash
Sealing your backsplash is an important step in protecting it from moisture and stains.
- Why Seal: A sealant creates a protective barrier on the surface of your tiles, preventing liquids from penetrating the grout and causing discoloration or damage.
- When to Seal: Most backsplashes benefit from being sealed. It’s especially important for porous materials like natural stone or grout.
- How to Seal: Apply the sealant according to the manufacturer’s instructions. Be sure to apply it evenly and let it dry completely before using your backsplash.
Common Backsplash Installation Mistakes
Here are some common mistakes to avoid when installing your backsplash:
- Improperly Mixed Grout: Mixing grout to the correct consistency is crucial for a smooth, even finish.
- Uneven Grout Lines: Make sure your grout lines are even and consistent.
- Not Sealing the Grout: Failing to seal the grout can lead to staining and water damage.
Home Improvement Straw
A “home improvement straw” is a hypothetical tool that could revolutionize the way we apply adhesives and grout during home improvement projects. This tool is designed to provide a more precise and efficient way to apply these materials, especially in hard-to-reach areas or when working with delicate surfaces.Imagine a scenario where you are installing a backsplash in your kitchen. You need to apply adhesive to the back of each tile before placing it on the wall.
Using a traditional trowel, you might struggle to get a consistent and even layer of adhesive, especially in tight corners or around outlets. Here, a home improvement straw could be a game-changer.
The Design and Functionality of the Home Improvement Straw
The home improvement straw would consist of a flexible, yet durable tube with a nozzle at one end and a handle at the other. The nozzle would be adjustable, allowing you to control the width and thickness of the adhesive or grout flow. This design would offer several advantages:
- Precise Application: The straw’s nozzle would allow for targeted application of adhesive or grout, reducing waste and mess. It would be particularly useful for applying adhesive to the back of small tiles, ensuring a consistent and even coverage.
- Easy Control: The handle would provide a comfortable grip, allowing you to control the flow of adhesive or grout with ease. This would be especially helpful when working in awkward positions or applying materials to delicate surfaces.
- Reduced Waste: The straw’s design would minimize the amount of adhesive or grout that is wasted, as you would be able to apply only the necessary amount. This would also reduce the amount of cleanup required after the project is complete.
The home improvement straw could be used with a variety of adhesives and grouts, including those that are water-based, oil-based, or epoxy-based. The straw’s material would be chosen to ensure compatibility with the specific adhesive or grout being used.However, there are some limitations to consider:
- Limited Volume: The straw would likely have a limited capacity, meaning you would need to refill it frequently. This could be a drawback for large projects.
- Potential Clogging: The nozzle could become clogged with adhesive or grout, especially if the material is thick or contains particles. This could require frequent cleaning to maintain the straw’s functionality.
- Not Suitable for All Applications: The straw would not be suitable for all adhesive or grout applications, such as those that require a thick layer of material or a specific texture.
Overall, the home improvement straw has the potential to be a valuable tool for DIYers and professionals alike. Its ability to provide precise and efficient application of adhesives and grouts could save time, reduce waste, and improve the overall quality of home improvement projects. However, it’s important to consider the limitations of the tool and choose the appropriate application for its use.
Installing a new backsplash can be a rewarding project, adding a touch of elegance and personality to your kitchen. By following these steps, you’ll have the confidence to tackle this project with ease, ensuring a successful and visually appealing outcome. Remember, meticulous planning, careful execution, and attention to detail are key to creating a beautiful and long-lasting backsplash that will be the centerpiece of your kitchen.
Questions and Answers
What are the most common backsplash materials?
Common backsplash materials include ceramic tile, porcelain tile, natural stone (like granite or marble), glass tile, and metal tile.
How do I choose the right grout color?
Consider the color of your tiles and countertop. A contrasting grout color can make the tiles stand out, while a matching grout color creates a seamless look.
What tools do I need for backsplash installation?
You’ll need tools like a tile cutter, level, trowel, spacers, grout float, and a sponge.
How do I clean up excess grout?
Use a damp sponge to wipe away excess grout while it’s still wet. For hardened grout, use a grout cleaning tool.
What are some common backsplash installation mistakes to avoid?
Common mistakes include not using spacers, applying too much adhesive, not cleaning up excess grout, and not sealing the grout.